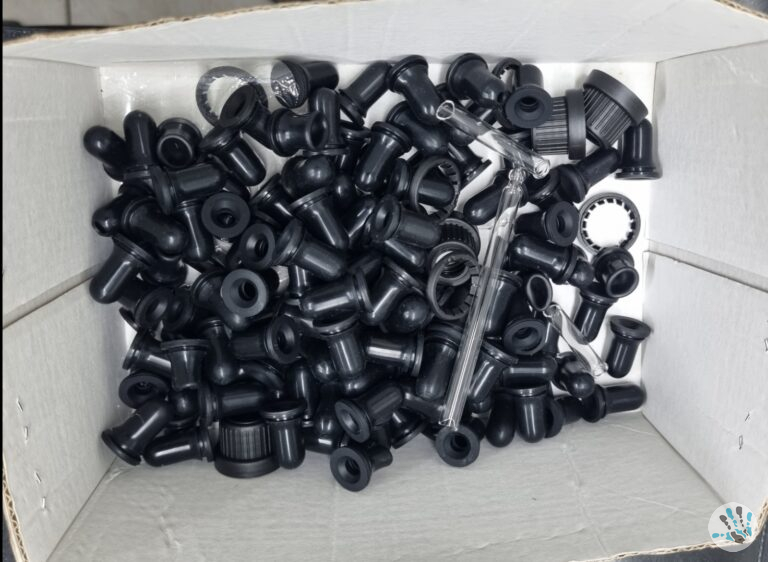
TE Plus Droppers: Checking the Tamper-Evident Ring in QC
A tamper-evident (TE) closure has one job: to show whether a bottle has been opened after it left your line. The breakable security ring on a TE Plus dropper does that visually, but only if the ring is intact when you cap the bottle and stays intact until the customer twists it open.
This article is a practical QC routine for production and quality managers who use TE Plus assembled droppers. It covers what to look at on incoming goods, what to check right after capping, and where rings get damaged on the way to the customer.
What a TE Plus dropper is made of
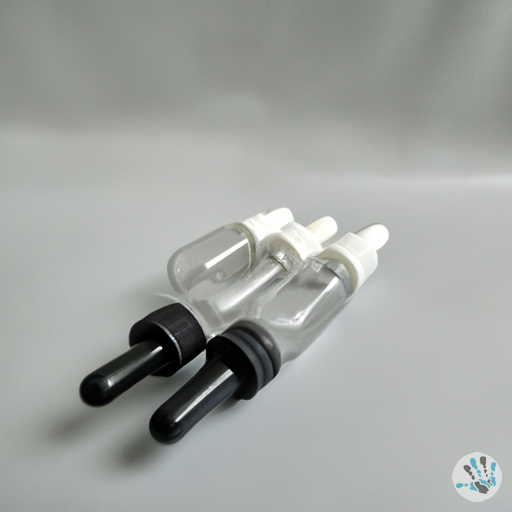
The TE Plus range consists of ready-assembled glass droppers for DIN18 (GL18) necks. Each unit combines three parts:
- a black NBR rubber teat,
- a black tamper-evident polypropylene (PP) collar with a breakable security ring, and
- a straight-tip glass pipette.
The 5 ml version is described as a black tamper-evident PP collar with a prominent cap. The other sizes list the breakable security ring in their descriptions. Check the product page for the exact variant you are ordering, since some sizes come in more than one version.
The ring is part of the collar. When the collar is first turned off the bottle, the ring separates from the collar body and stays on the neck. That visible gap, or the loose ring, is the evidence of opening.

What tamper evidence does and does not do
It helps to be precise in your internal documents and on your marketing copy.
- It does: give a visible sign that the closure has been turned after first application.
- It does not: make the bottle child-resistant. If your market or product requires that, look at the CRC/TE child-resistant tamper-evident droppers.
- It does not: replace a leak test or a seal-integrity test for your specific formula.
Whether tamper evidence is required, and in what form, depends on your product type and sales market. Confirm this with your regulatory contact before you finalize the packaging spec. We do not make compliance claims on behalf of your finished product.
Step 1: Incoming inspection of the dropper cartons
Most ring damage is visible before the first bottle is filled. Pull a sample from several cartons, not just the top one, and check the following.
- Ring continuity. Look all the way around the ring. The bridges that hold it to the collar should be present and uniform, with no cracks or stretched sections.
- Ring position. The ring should sit evenly at the bottom edge of the collar, not tilted or partly pushed up.
- Collar shape. Look for visible distortion, flash or scuffs that could affect how the collar seats on the neck.
- Teat seating. The NBR teat should sit fully in the collar without twisting or sticking out unevenly.
- Pipette alignment. The straight-tip pipette should be centered and undamaged at the tip. Our incoming inspection practices for glass pipettes apply here too: look for chips and cracks at the tip and rim.
Record what you find against a simple accept/reject standard with photos of acceptable and unacceptable rings. Operators make better decisions when they can compare against a picture.
Step 2: Match the dropper to the bottle
A ring can only work as intended when the neck finish and the collar fit together properly. TE Plus droppers are made for DIN18 (GL18) necks, so the bottle must match. The ring needs to engage with the bead or lip on the neck, and neck dimensions vary between bottle designs.
Before a full run, test your actual bottles with your actual droppers. Our DIN18/GL18 dropper bottles are a natural starting point if you are choosing glass at the same time. Also confirm that the pipette length suits the bottle height. The pipettes in the range are matched to volume as follows:
| Bottle size | Straight-tip pipette length |
|---|---|
| 5 ml | 48 mm |
| 10 ml | 58 mm |
| 15 ml | 63 mm |
| 20 ml | 70 mm |
| 30 ml | 77 mm |
| 50 ml | 90 mm |
| 100 ml | 108 mm |
A 10 ml option is the 10 ml TE Plus Night assembled dropper with a 58 mm pipette.
Step 3: Checks during and after capping
The capping step is where a good ring can become a bad one. Whether you cap by hand, with a semi-automatic machine or on a full line, the same principles hold.
Set the closing force by testing, not guessing
Too little force and the collar may loosen in transit. Too much and the ring can be stressed or the bridges can break during capping, which defeats the purpose. We do not publish a torque figure here because the right setting depends on your bottle, your chuck or head, and your product. Define it yourself on a trial run, write it down, and check it at the start of each shift.
A simple post-capping routine
- Visual check on every bottle for broken, stretched or displaced rings. On a line this can be a quick operator look or a camera check.
- Sample check at set intervals (for example, every batch start, mid-batch and end). Confirm the collar is tight and the ring is still intact.
- Leak check on samples if your liquid is thin or sensitive. Invert the bottle for a set time and look for weeping at the collar.
- Opening test on a few units to confirm the ring separates cleanly the first time. Discard these afterwards.
If you see damaged rings at one position repeatedly, suspect the capping head, a misaligned guide, or bottles with a neck finish that is out of tolerance.
Step 4: Protect the ring after capping
Rings are often damaged after the line, not on it. Common causes are:
- loose bottles knocking together in a tote or carton,
- dividers or inserts that press on the collar,
- operators carrying bottles by the collar,
- repeated handling during labeling, boxing or sample picking.
Keep bottles upright and separated in the shipper. If you pack in bulk, our notes on packing glass bottles and droppers for shipments cover the basics. Handle finished goods by the body of the bottle.
Common mistakes
- Opening a carton, checking one dropper and approving the lot. Sample across several cartons.
- Re-capping a bottle after the ring has broken. A broken ring cannot be reset. Treat that bottle as opened and reject it.
- Using a different neck finish by accident. Confirm DIN18 (GL18) before you order a new bottle.
- Not training the team on what a bad ring looks like. A reference photo board helps.
- Treating tamper evidence as child resistance. They are separate features.
Building a one-page QC sheet
Put these on a single sheet that production and QA both use:
- Part description (size, pipette length, teat and collar material).
- Incoming checks and accept/reject photos.
- Capping settings you have validated.
- Sampling frequency and the checks at each sample.
- What to do with rejected bottles.
This keeps checks consistent between shifts and makes it easy to explain your process during a customer audit.
FAQ
Can I reuse a TE Plus collar after the ring has broken?
No. The ring is designed to break on first opening. A collar with a broken ring no longer shows tamper evidence, so it should not be used on a product sold as tamper-evident.
Are TE Plus droppers child-resistant?
No. TE Plus droppers are tamper-evident. If you need a child-resistant closure, see our CRC/TE range.
Which bottle neck do TE Plus droppers fit?
They are made for DIN18 (GL18) necks. Always test your specific bottle with the dropper before a production run.
What torque should I use when capping?
We do not give a single figure, because it depends on your bottle, capping equipment and product. Determine it on a trial run, document it and verify it regularly.
Want to try the rings on your own bottles first? Browse the shop or contact us to ask about samples and advice on the right TE Plus size for your line.